.png)
Pottery Course
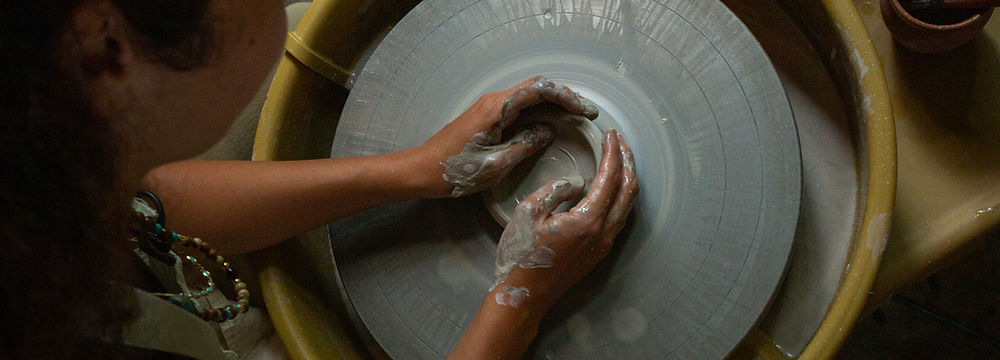
Learn the essentials of pottery in 3 classes: wheel throwing, trimming, and glazing.


Workshop Description
In this three-class pottery course, you'll learn the essential skills of wheel throwing, trimming, and glazing to create your own unique pottery pieces from start to finish. After completing this course, you’ll have the confidence and foundational skills to work independently on the wheel and continue practicing during our Open Studio hours. What You’ll Learn: • Wheel Throwing Techniques: Master the basics of centering clay, shaping forms, and controlling thickness to create balanced pottery pieces on the wheel. • Trimming and Detailing: Learn trimming techniques to refine the shape, smooth surfaces, and add foot rings, giving your pieces a professional look and stability. • Glazing Essentials: Explore glazing techniques to add color, texture, and durability to your work, along with tips on applying even coats and experimenting with different finishes. What’s Included: • Three 1.5-hour classes with our pottery instructor • All materials and equipment provided • Take home your finished, glazed pottery pieces after the course COURSE SCHEDULE • Class 1: Wheel Throwing and Clay Preparation In the first class, you’ll be introduced to the basics of pottery, including where our clay comes from and how to prepare it. You’ll learn how to cut, wedge, and prepare the clay for wheel throwing. On the wheel, we’ll guide you through centering the clay and shaping it into your first pottery forms. By the end of this session, you’ll have created 2-3 pieces to build on in the following classes. • Class 2: Trimming and Refinement Once your pieces have dried for a few days to a leather-hard stage (timing may vary depending on weather), we’ll begin trimming. In this class, you’ll learn to use various tools and techniques to refine the shape, smooth surfaces, and add details, giving your pieces a polished, professional look. After trimming, the pieces will need additional drying time before they go into the kiln for bisque firing. • Class 3: Glazing and Finishing After bisque firing, we’ll smooth any rough spots and introduce wax-resist techniques to enhance your glaze design. You’ll choose colors and finishes from our glaze wall, and after glazing, your pieces will undergo a final firing. Your work will be ready for pick-up in a few days! Flexible scheduling available: This course on our schedule can also be offered on different days or times. Contact us to arrange a time that works for you! + (507) 6387-1069.
Upcoming Sessions
Cancellation Policy
To schedule your spot in our courses, please contact us directly to arrange your preferred dates. We’ll help you find a time that works for you! You can reach us via WhatsApp at + (507) 6387-1069.